")

Valorant’s got players hooked, but what happens when they decide it’s time to part ways? Picture this: they click that uninstall button, and instead of freedom, they’re met with a stubborn game that refuses to budge. It’s like trying to get a cat into a bath—frustrating and utterly baffling.
Common Issues Preventing Uninstallation
Players often encounter specific obstacles when trying to uninstall Valorant. Recognizing these common issues helps navigate the uninstallation process more effectively.
Corrupted Files
Corrupted files frequently hinder the uninstallation of Valorant. These damaged files may prevent proper removal procedures from completing. Players can experience this issue due to unexpected crashes or incomplete updates. Repairing the game through the Riot client may resolve these problems. Using the built-in repair tool restores corrupted files. If repairing doesn’t work, manually deleting the installation folder could be necessary, although this may leave residual files.
Running Background Processes
Running background processes can also obstruct the uninstallation process. Valorant may have active processes, such as the Riot Vanguard anti-cheat system, preventing removal. Players should check the Task Manager for any lingering Valorant processes. Closing these processes allows the uninstallation to proceed smoothly. If background services persist, a system restart may help. Disabling any startup programs related to Valorant can further ease the uninstallation.
Steps to Uninstall Valorant
Uninstalling Valorant can be a straightforward process when you follow the right steps. Below are methods to effectively remove the game from your system.
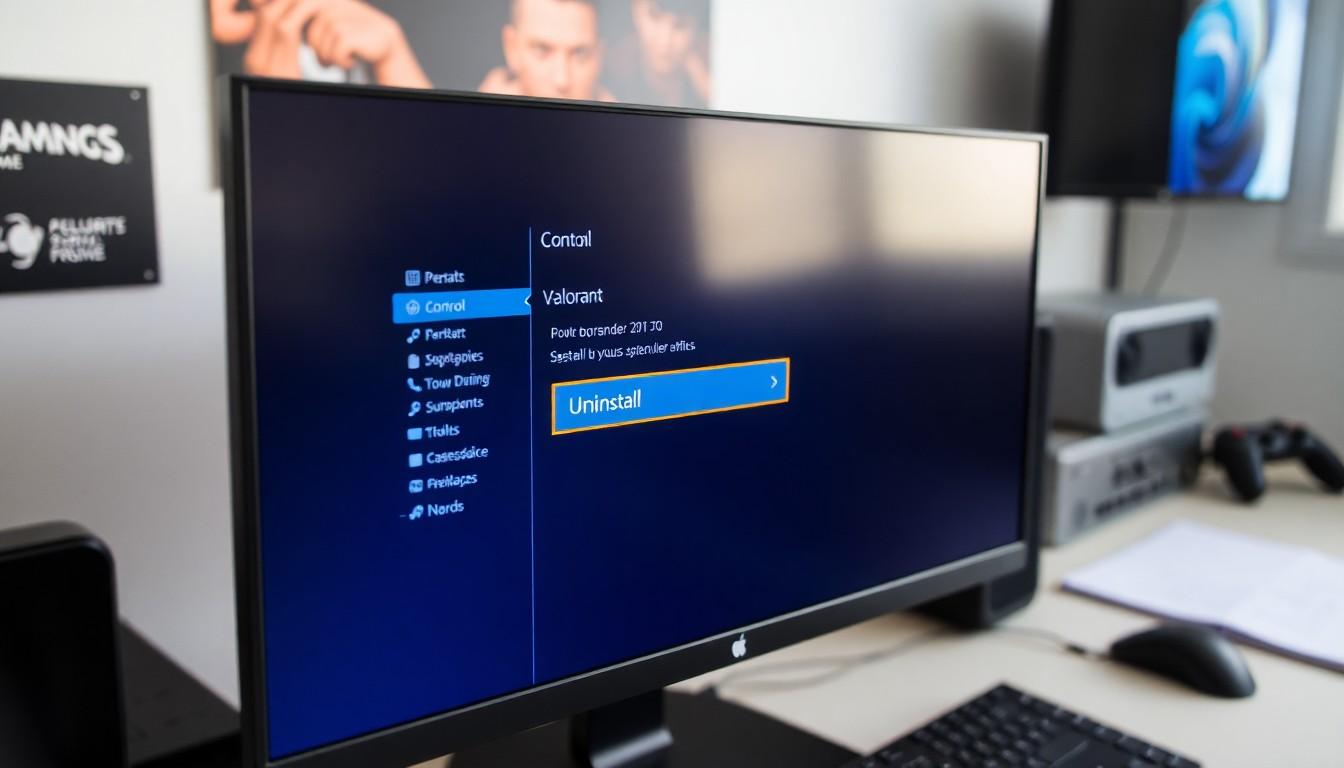
Using Control Panel
Access the Control Panel from the Start menu. Navigate to “Programs” and then click “Programs and Features.” Locate Valorant in the list of installed programs. Right-click on Valorant and select “Uninstall.” After selecting this option, follow the prompts to complete the uninstallation process. If any issues arise, check for running background processes that may interfere.
Using Riot Client
Open the Riot Client to begin. Find the Valorant tile on the main screen. Click on the gear icon or settings option next to the Valorant title. Choose the “Uninstall” option from the dropdown menu. Confirm your choice to uninstall Valorant. It’s essential to ensure no Riot Vanguard processes are active beforehand for a smooth experience.
Troubleshooting Uninstallation Problems
Uninstalling Valorant can pose several challenges. Identifying issues and following specific steps helps ensure a smoother experience.
Checking System Requirements
Players must check system requirements to avoid conflicts during uninstallation. Valorant’s files may depend on certain settings and configurations on the computer. Verifying RAM and storage space can prevent errors. Insufficient memory often leads to installation remnants remaining on the device. Additionally, ensuring the operating system is up to date supports compatibility. Bugs may arise if outdated systems are involved. Incompatibility with certain software versions can also hinder the process. Therefore, checking all system parameters enhances the likelihood of successful removal.
Ending Processes in Task Manager
Ending active processes in Task Manager is crucial for uninstallation. Players should open Task Manager by pressing Ctrl, Shift, and Esc simultaneously. After that, looking for the Riot Vanguard processes helps identify any blocking components. If found, clicking on “End Task” allows players to terminate those processes. Reviewing all active applications is important since other background programs might interfere. Closing unnecessary applications boosts efficiency during removal. Players may also consider restarting their computers to clear lingering tasks, increasing the chances of a hassle-free uninstallation. This proactive approach streamlines the process significantly.
Alternative Methods to Remove Valorant
Players can explore alternative methods when standard uninstallation fails. Understanding these options ensures a complete removal of Valorant.
Manual Deletion of Game Files
Manually deleting game files provides a straightforward approach. Players can locate the installation directory, typically found in “C:Program FilesRiot GamesValorant.” Once there, they should select all files and folders, then delete them. After that, checking for leftover files in the “AppData” directory, particularly under “Local” and “Roaming,” can eliminate additional remnants. Restarting the computer afterward confirms that all processes associated with Valorant are stopped. This method ensures that no unwanted files remain on the system.
Using Third-Party Uninstaller Software
Third-party uninstaller software offers an efficient alternative to traditional methods. Programs like Revo Uninstaller or IObit Uninstaller streamline the process by automatically detecting leftover files and registry entries. Users should install the chosen software, scan for Valorant, and follow the prompts to uninstall. This option not only removes the game but also cleans up associated remnants, significantly reducing clutter. Additionally, investing in reputable uninstaller software makes it easier to manage future uninstallation challenges.
Conclusion
Uninstalling Valorant can be a frustrating task for many players. By understanding the common obstacles like corrupted files and active processes, they can navigate the uninstallation process more effectively. Utilizing tools such as the Riot client’s repair tool or third-party uninstaller software can simplify the experience.
Taking proactive steps to address potential issues ensures a smoother removal. With the right approach players can successfully eliminate Valorant from their systems without leaving behind unwanted files. This not only frees up valuable storage space but also helps maintain system performance.